Godot实战-SnakeWar(11)
简单的地图编辑器
Godot实战-SnakeWar(11)
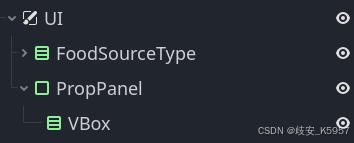
【关卡中的资源单位】
考虑一下三种资源在关卡中的作用。
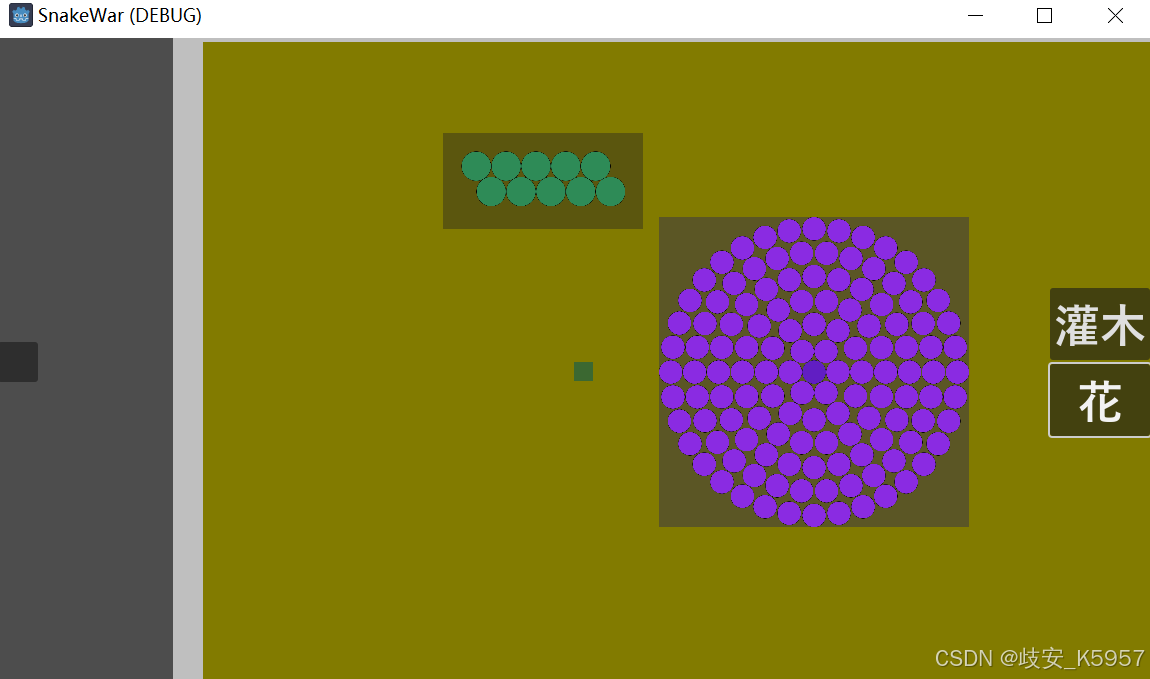
灌木应该作为可消除的“墙”存在,可大可小。同时,它也是最容易获取的初期资源。
花可以源源不断地提供食物。不过,花的核心无法消除,将作为障碍杀死过于贪婪的蛇。
风铃草的定位有点尴尬,我希望它有更强的运动能力,不是待在原地旋转,而是从地图外飞入,按一定方向边旋转边移动,在彻底离开地图的时候被销毁。大胆的蛇可以尝试猎食它的束,获取大量食物。
【放置资源】
先尝试把食物资源放入关卡。
-
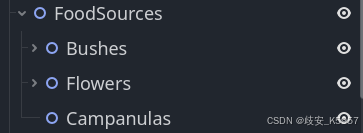
在Level场景中添加Node2D子结点,重命名为FoodSources。为该结点添加三个Node2D子结点,分别重命名为Bushes、Flowers、Campanulas。
-
点锁链按钮链接子场景,在Bushes结点下添加几个Bush,调整位置和其他export的属性。
-
对Flowers做同样的事情,这次添加Flower。
-
来到level.gd,在
_ready()中添加:
	for bush in $FoodSources/Bushes.get_children():
		bush.burst_to_foods.connect(handle_burst)
		bush.init_source()

	for flower in $FoodSources/Flowers.get_children():
		flower.burst_to_foods.connect(handle_burst)
		flower.init_source()
- 为了让风铃草可以从生成点移动到消失点,需要修改campanula.gd:
var move_speed : float = 0.5
var dirc : Vector2 = Vector2.RIGHT
var vanish_point : Vector2

func _ready():
	dirc = dirc.rotated(randf_range(PI/6, PI/3))  # 决定飞出的方向

func _physics_process(delta):
	rotation += delta * rot_speed
	global_position += (delta * move_speed * layer_num * diameter) * dirc

	var margin = diameter * layer_num * scale.x + 100
	if global_position.x > vanish_point.x+margin || global_position.y > vanish_point.y+margin:
		queue_free()
- 回到level.gd,像倒计时一样写一个自调用函数:
func add_campanula(pos:Vector2):
	var campanula = campanula_scene.instantiate()
	campanula.layer_num = randi_range(6, 12)
	campanula.value = 2
	campanula.global_position = pos #生成点
	campanula.vanish_point = $MarkerBottomRight.global_position #消失点

	campanula.burst_to_foods.connect(handle_burst)
	$FoodSources/Campanulas.add_child(campanula)
	campanula.init_source()

	#每隔一段时间生成
	await get_tree().create_timer(randi_range(10, 30)).timeout
	add_campanula(pos)
- 在
_ready()中调用它:
	# 生成点在左上方,有一定偏移,避免在可见范围突然出现
	add_campanula($MarkerTopLeft.global_position-Vector2(300, 300))
- 现在试玩游戏,从选择敌人开始到进入关卡,同时对抗敌人和FoodSource来获得更高分数。这个玩法已经基本得到验证。可以继续微调各项属性来优化每个资源单位,但是在此之前,我想先制作更多的地图。
【地图编辑器(简易)】
目前,我只希望方便自己编辑关卡(主要是FoodSource的排布),而不是在游戏中内置地图编辑器。因此,我的编辑器只需要实现以下功能:
- 拥有摄像头观察地图的每个角落,允许摄像头移动和放缩;
- 可以添加、删除任一FoodSource并通过鼠标拖动的方式放置它们。
- 修改FoodSource的某些属性。
- 保存布置好的地图
【标注FoodSource的占地面积】
这可以用一个半透明的单色矩形来表示。
- 来到FoodSource场景,添加一个ColorRect结点,默认设置为隐藏。在foodsource.gd中设置新变量:
var area_color : Color = Color(0, 0, 0.545098, 0.3) # 半透明深蓝色
- 从bush.gd开始,要做的工作是给这个ColorRect填色、规定合适的大小(覆盖整个FoodSource)、放在恰当位置。
func show_area():
	set_size(size)
	modulate = color
	# 先清除,再生成
	if get_child_count() > 1:
		for i in range(1, get_child_count()):
			get_child(i).queue_free()
	form()
	$ColorRect.show()


	var width = (col_num-1+row_num/1.41)*diameter + 2*padding #1.41是根号2的约数
	var height = row_num*diameter + 2*padding

	$ColorRect.color = area_color
	$ColorRect.size = Vector2(width, height)
	$ColorRect.position = Vector2(-diameter/2-padding, -diameter/2-padding)
为方便测试,在_ready()里调用一下,挂一个摄像机用于观察。
可以看到基本覆盖了整个灌木。垂直方向有一点冗余,这是因为致密的排布方式,问题不大。
- 将灌木的摇摆考虑进来:按照之前的设置,每次摇摆,灌木会往左/右移动一个
padding,往上/下移动一个padding,那么矩形水平和垂直方向的长度各需要两倍padding的冗余,且位置需要向左、向上各移动一个padding。
	var width = (col_num+0.5)*diameter + 2*padding
	var height = row_num*diameter + 2*padding

	$ColorRect.color = area_color
	$ColorRect.size = Vector2(width, height)
	$ColorRect.position = Vector2(-diameter/2-padding, -diameter/2-padding)
-
删除观察用的Camera2D,保存场景。
-
继续完成花的占地示意。在flower.gd中编写方法
func show_area():
	set_size(size)
	modulate = Color.BLUE_VIOLET
	$ColorRect.show()

	for i in range(max_layer):
		grow(i+1)

	var width : float = (max_layer+0.5)*diameter*2
	$ColorRect.color = area_color
	$ColorRect.size = Vector2(width, width)
	$ColorRect.position = Vector2(-width/2, -width/2)
- 风铃草从场外飞入,暂时不考虑占地示意。
【编辑器的基本构成】
-
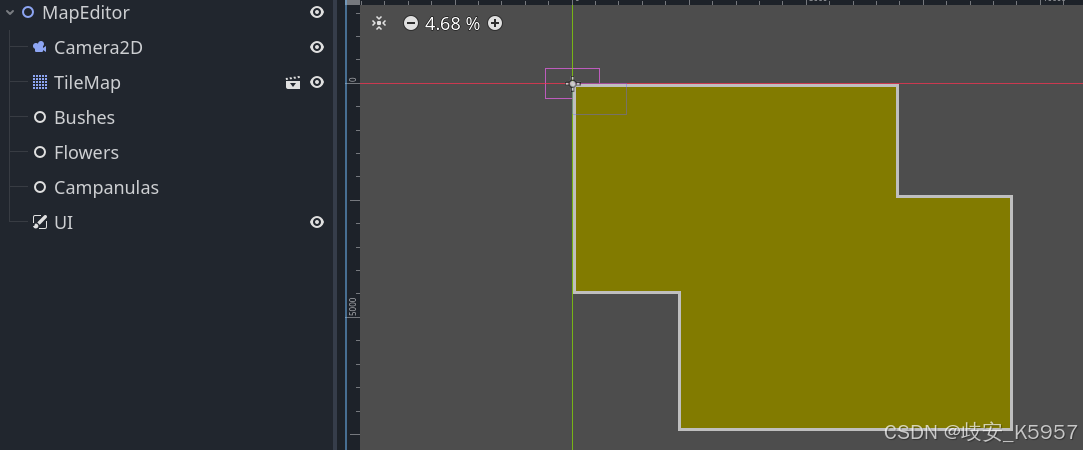
新建场景,根节点Node2D,重命名为MapEditor,保存。
-
根节点下应有一个Camera2D,一个CanvasLayer(重命名为UI)。另有三个并列的Node结点,分别命名为Bushes、Flowers、Campanulas。
-
回到Level场景,右击TileMap结点,Save Branch as Scene。这个TileMap将作为模板,拥有需要的TileSet、Layer等种种数据,而且之后可以根据需要修改。
-
回到MapEditor场景,点击锁链添加子场景tile_map.tscn。现在可以随意绘制一次新的地图,比如像这样。
【摄像机移动】
-
对于摄像机,我需要上下左右和缩放。这里需要收集输入信息,因此要在Project Settings-Input Map里增添新动作。
-
在Add New Action处输入“up”,点击Add。在新出现的动作项中点击右边的加号,按下键盘中的向上箭头,点OK。再次按下加号,按下“W”,点OK。这样就有上下左右和WASD两套移动按键。
-
使用类似方法绑定down、left、right,以及left_click、wheel_up(滚轮向上)、wheel_down(滚轮向下)。注意鼠标相关的动作需要点开Mouse Buttons列表来选,不能像键盘按键一样直接捕获。
-
回到场景MapEditor,为该场景附加一个空脚本。添加相机移动和缩放功能。注意滚轮相关需要用
is_action_just_released才能起作用。
extends Node2D

var camera_move : float = 10

func _process(_delta):
	camera_action()

func camera_action():
	if Input.is_action_pressed("up"):
		$Camera2D.global_position.y -= camera_move / $Camera2D.zoom.x
	if Input.is_action_pressed("down"):
		$Camera2D.global_position.y += camera_move / $Camera2D.zoom.x
	if Input.is_action_pressed("left"):
		$Camera2D.global_position.x -= camera_move / $Camera2D.zoom.x
	if Input.is_action_pressed("right"):
		$Camera2D.global_position.x += camera_move / $Camera2D.zoom.x
	if Input.is_action_just_released("wheel_up"):
		$Camera2D.zoom *= 1.1
	if Input.is_action_just_released("wheel_down"):
		$Camera2D.zoom /= 1.1
- 尝试运行场景,可以正常四处移动摄像头以及缩放场景。
【添加FoodSource】
-
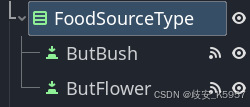
在MapEditor场景的UI结点下新增子结点VBox,重命名为FoodSourceType。在VBox下新增两个Button,分别重命名为ButBush和ButFlower,它们的显示文字分别为“灌木”和“花”,调整字号为46。修改VBox的锚点为右侧居中。
-
在map_editor.gd中新增两个变量:
var bush_scene = preload("res://Scenes/bush.tscn")var flower_scene = preload("res://Scenes/flower.tscn") -
将ButBush的
pressed信号连接到MapEditor。每当按下灌木按钮,将会在摄像头位置(画面中心)生成一个灌木。
func _on_but_bush_pressed():
	var bush = bush_scene.instantiate()
	bush.global_position = $Camera2D.global_position
	$Bushes.add_child(bush)
	bush.show_area()
注意,必须先将bush添加到场景树,再进行show_area()操作,不然会出现bug。
- 对ButFlower做类似的事情,不过新生成的是花。
func _on_but_flower_pressed():
	var flower = flower_scene.instantiate()
	flower.global_position = $Camera2D.global_position
	$Flowers.add_child(flower)
	flower.show_area()
-
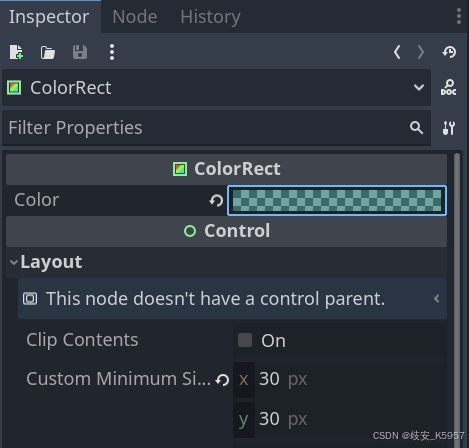
为摄像头新增一个ColorRect,设置一个半透明颜色,大小30x30px即可。这相当于准星,提示了当前摄像头的位置。
-
现在运行MapEditor场景,可以自由移动摄像头,并在喜欢的位置放下灌木或者花。
【移动FoodSource】
- 来到Bush场景,将ColorRect的
mouse_entered()连接到Bush。当鼠标进入ColorRect所在区域,将激发一个自定义信号signal targeted:
func _on_color_rect_mouse_entered():
	targeted.emit()
- 回到MapEditor场景,在脚本map_editor中处理信号连接:每当接收到
targeted信号,设置发出信号的FoodSource为current_dragged。
# 新增自定义变量
var current_dragged : FoodSource = null
func _on_but_bush_pressed():
	var bush = bush_scene.instantiate()
	bush.global_position = $Camera2D.global_position
	$Bushes.add_child(bush)
	bush.show_area()
	bush.targeted.connect(set_target.bind(bush)) #连接信号,参数是自身

func set_target(fs : FoodSource):
	current_dragged = fs
- 写拖拽处理,这次我打算使用
_input():
var dragging : bool = false

func _input(event):
	if event is InputEventMouseButton and event.button_index == MOUSE_BUTTON_RIGHT:
		if current_dragged:
			if not dragging and event.pressed:
				dragging = true
		if dragging and not event.pressed:
			dragging = false
			current_dragged = null
	if event is InputEventMouseMotion and dragging and current_dragged:
		current_dragged.global_position = get_global_mouse_position()
- 运行场景,现在能够随意添加灌木或花,并通过鼠标右键拖拽移动它们。
【展示和修改属性】
只是单纯添加一模一样的花和灌木有点单调,我希望可以调节某些属性,比如灌木的行数和列数。因此,需要有属性栏来展示属性,并且修改属性栏里的数值时,对应的FoodSource也要发生改变。
-
在MapEditor场景的UI结点下添加PanelContainer子结点,重命名为PropPanel。为该结点添加VBox子结点。
-
在这个VBox下,每条属性构成一栏。属性栏包含属性标签和数值控件,可以显示指定的属性,并且在数值修改时反应到对应的场景上。
-
新建场景,根节点为HBox,重命名为PropLine。添加Label子结点。保存。
-
附加空白脚本prop_line.gd,展示数值的value_box将根据传入的value类型来构造。当前我需要展示和修改的属性只有
size(float)、row_num(int)、col_num(int),所以只需要判断这两种。之后可以根据需要添加。
extends HBoxContainer

var value_box : Control = Control.new()

signal updated(prop, value)

func new(prop, value) -> Control:
	$Label.text = prop

	if typeof(value) == TYPE_INT:
		value_box = SpinBox.new()
		value_box.min_value = 0
		value_box.max_value = 100
		value_box.step = 1
		value_box.value = value

	elif typeof(value) == TYPE_FLOAT:
		value_box = SpinBox.new()
		value_box.min_value = 0
		value_box.max_value = 1
		value_box.step = 0.1
		value_box.value = value
	else:
		push_error("缺失合适的值类型")
		push_error("当前值类型为"+str(value.get_class()))

	add_child(value_box)
	if value_box.has_signal("value_changed"):
		print(value_box.get_class())
		value_box.value_changed.connect(on_value_changed)
	else:
		push_error("PropLine缺失相关信号, 类型为"+str(value_box.get_class()))
	return self


func on_value_changed(value):
	# 每当属性面板的数值变更,发送属性和值
	updated.emit($Label.text, value)

func get_value():
	return value_box.value
- 现在回到map_editor.gd,处理展示属性和修改属性的逻辑。新增变量
selected:FoodSource,储存被选中的FoodSource。
func show_property():
	var data : Dictionary = selected.get_showdata()
	# 过滤掉不需要展示的属性
	var num = data.keys().filter(func(k):
		return typeof(data[k]) != TYPE_STRING).size()
	if $UI/PropPanel/VBox.get_child_count() < num:
		for prop in data:
			if typeof(data[prop]) != TYPE_STRING:
				var propline = propline_scene.instantiate()
				propline = propline.new(prop, data[prop])
				$UI/PropPanel/VBox.add_child(propline)
				propline.updated.connect(on_updated)
			else:
				print(prop)

func on_updated(prop, value):
	selected.set(prop, value)  # 修改对应属性的值
	selected.show_area()  # 刷新展示
	selected.select(true)
- 为了实现“鼠标点选”,我希望知道鼠标当前是否指向某个FoodSource,以及指向了哪一个。回到food_source.gd,就像
targeted一样,当鼠标离开ColorRect区域时,也发射一个release信号。
signal released

func _on_color_rect_mouse_exited():
	released.emit()
- 另外设置一个
select方法,当选中时变更ColorRect为红色,取消选择则恢复原色。
func select(is_selected:bool):
	if is_selected:
		$ColorRect.color = Color(0.862745, 0.0784314, 0.235294, 0.6)
	else:
		$ColorRect.color = area_color
- 回到map_editor.gd,在新生成灌木和花的时候,连接这个信号:
func _on_but_bush_pressed():
	var bush = bush_scene.instantiate()
	bush.global_position = $Camera2D.global_position
	$Bushes.add_child(bush)
	bush.show_area()
	bush.targeted.connect(set_target.bind(bush))
	bush.released.connect(release_target.bind(bush))

func _on_but_flower_pressed():
	var flower = flower_scene.instantiate()
	flower.global_position = $Camera2D.global_position
	$Flowers.add_child(flower)
	flower.show_area()
	flower.targeted.connect(set_target.bind(flower))
	flower.released.connect(release_target.bind(flower))
- 新增一个
pointed信号。新增release_target()方法并稍微修改set_target(),增加关于pointed的处理。
func set_target(fs : FoodSource):
	pointed = fs
	current_dragged = fs


func release_target(fs : FoodSource):
	pointed = null
- 在
_input()方法中增加关于点选的逻辑:
func _input(event):
	# 拖拽
	if event is InputEventMouseButton and event.button_index == MOUSE_BUTTON_RIGHT:
		if current_dragged:
			if not dragging and event.pressed:
				dragging = true
		if dragging and not event.pressed:
			dragging = false
			current_dragged = null
	if event is InputEventMouseMotion and dragging and current_dragged:
		current_dragged.global_position = get_global_mouse_position()

	# 展示属性
	if event is InputEventMouseButton and event.button_index == MOUSE_BUTTON_LEFT:
		if pointed:
			if selected and pointed != selected:
				# 更换选择对象的情况,取消选择并清空属性栏
				selected.select(false)
				for c in $UI/PropPanel/VBox.get_children():
					c.queue_free()
			selected = pointed
			selected.select(true)
			show_property()
- 运行场景,可以看到每当选中某个灌木或花,它的区域示意将会变红,且显示可以修改的属性。通过属性栏修改属性(比如
size)之后,被选中的FoodSource也会发生对应变化。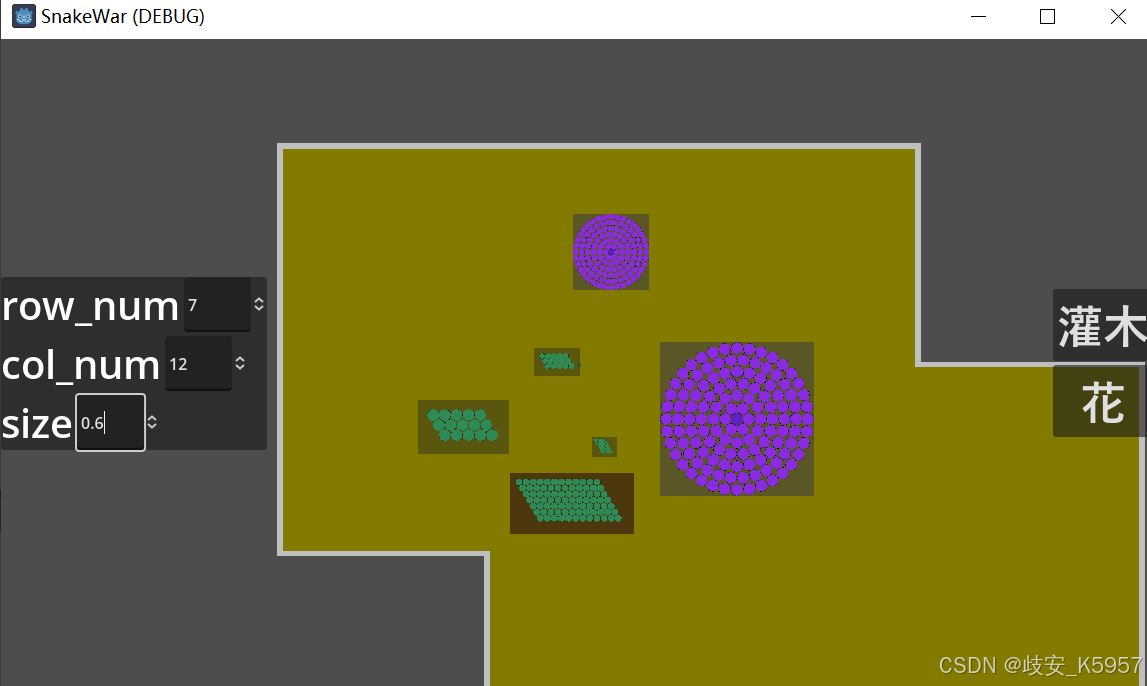
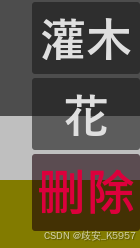
【删除FoodSource】
-
添加一个删除按钮,放在UI-FoodSourceType结点下。显示文字“删除”,调整字号为50。
-
连接该按钮的
_press()信号,写删除方法:
func _on_but_delete_pressed():
	if selected:
		selected.queue_free()
		selected = null
		pointed = null
		# 清空属性栏
		for c in $UI/PropPanel/VBox.get_children():
			c.queue_free()
-
运行场景测试,添加多个灌木和花,点击删除按钮即可删除被选中的那一个。注意如果按钮下方正好有一个灌木或花,会触发点击选中并且删除。
-
为了显眼一点,可以给删除按钮调个色:在Inspector-CanvasLayer-Visibility中找到modulate,调一个红色。现在删除按钮不会和其他按钮搞混了。

助力广东及东莞地区开发者,代码托管、在线学习与竞赛、技术交流与分享、资源共享、职业发展,成为松山湖开发者首选的工作与学习平台
更多推荐


 22
22 0
0- 0


 已为社区贡献1条内容

所有评论(0)