基于 LVS+Keepalived+NFS 的高可用 Web 集群构建与验证
本文详细介绍了基于LVS+Keepalived+Nginx的高可用负载均衡集群搭建方案。系统规划包括6台服务器:1台NFS存储、2台Web服务器(RS1/RS2)、2台LVS负载均衡器(主备)和1台客户端。关键技术实现包括:1)使用脚本自动化配置主机名和IP;2)NFS共享存储搭建;3)Web服务器Nginx安装及NFS挂载;4)LVS主备配置(DR模式)及Keepalived高可用方案,配置VI
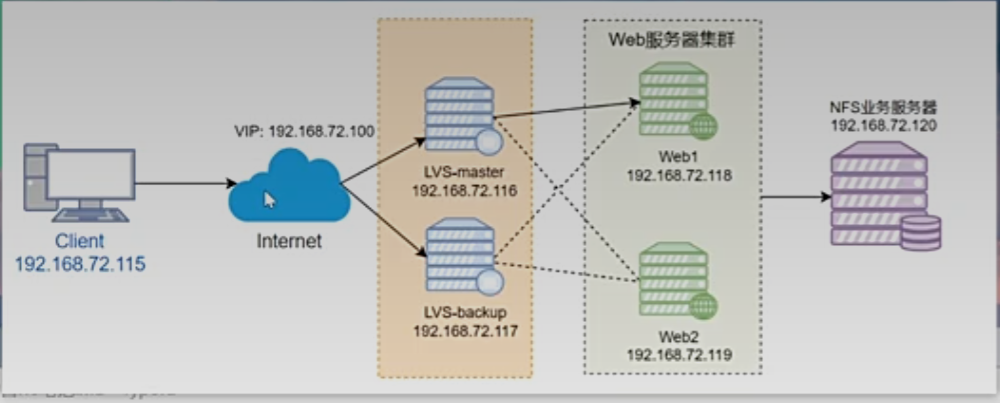 2.1 主机规划
| 主机 | 系统 | 软件 | IP |
|---|---|---|---|
| client | redhat9.7 | 无 | 192.168.72.115/24 |
| lvs-master | redhat9.7 | ipvsadm keepalived | VIP:192.168.72.100/32 DIP:192.168.72.116/24 |
| lvs-backup | redhat9.7 | ipvsadm keepalived | VIP:192.168.72.100/32 DIP:192.168.72.117/24 |
| rs1 | redhat9.7 | nginx, nfs-utils | 192.168.72.118/24 |
| rs2 | redhat9.7 | nginx, nfs-utils | 192.168.72.119/24 |
| nfs | redhat9.7 | nfs-utils | 192.168.72.120/24 |
使用脚本修改ip+主机名
#!/bin/bash
# useage: sudo ./init_sys.sh <hostname> <ip_address> [gateway] [dns]
RED='\033[0;31m'
GREEN='\033[0;32m'
YELLOW='\033[1;33m'
NC='\033[0m'log_info() {
echo -e "${GREEN}[INFO]${NC} $1"
}
log_warn() {
echo -e "${YELLOW}[WARN]${NC} $1"
}
log_error() {
echo -e "${RED}[ERROR]${NC} $1"
}check_root() {
if [[ $EUID -ne 0 ]]; then
log_error "此脚本必须以root权限运行"
exit 1
fi
}usage() {
echo "用法: $0 <hostname> <ip_address> [gateway] [dns_servers]"
echo ""
echo "参数说明:"
echo " hostname 要设置的主机名"
echo " ip_address 要设置的静态IP地址 (如: 192.168.72.100)"
echo " gateway 网关地址 (如: 192.168.72.2)"
echo " dns_servers DNS服务器,逗号分隔 (可选,默认: 8.8.8.8,223.5.5.5)"
echo ""
echo "示例:"
echo " $0 myserver 192.168.72.100 192.168.72.2 8.8.8.8,223.5.5.5"
echo " $0 webserver 10.0.0.50"
exit 1
}get_interface() {
# 尝试获取第一个活动的非环回接口
local interface=$(ip route | grep default | head -1 | awk '{print $5}' 2>/dev/null)if [[ -z "$interface" ]]; then
# 如果没有默认路由,获取第一个非环回接口
interface=$(ip link show | grep -v lo | grep 'state UP' | head -1 | awk -F': ' '{print $2}')
fiif [[ -z "$interface" ]]; then
log_error "无法自动检测网络接口"
read -p "请输入网络接口名称 (如: eth0, ens160): " interface
fiecho "$interface"
}set_hostname() {
local hostname=$1log_info "正在设置主机名为: $hostname"
/usr/bin/hostnamectl set-hostname $hostname
log_info "主机名设置完成"
}set_static_ip() {
local interface=$(get_interface)
local ip=$1
local gateway=${2:-"192.168.72.2"}
local dns=${3:-"223.5.5.5,8.8.8.8"}log_info "正在为接口 $interface 配置静态IP: $ip"
nmcli c modify $interface ipv4.method manual ipv4.addresses $ip/24 ipv4.gateway $gateway ipv4.dns $dns connection.autoconnect yes
nmcli c up $interface
}main() {
if [[ $# -lt 2 ]]; then
usage
ficheck_root
set_hostname "$1"
set_static_ip "$2" "$3" "$4"
}main "$@"
执行以下命令关闭防火墙,selinux

2.3 搭建NFS
1、安装nfs-utils工具

2、创建共享目录和文件

3、给共享目录设置权限

4、配置nfs

5、配置生效
![]()
6、启动服务

7、验证配置

2.4 搭建web1
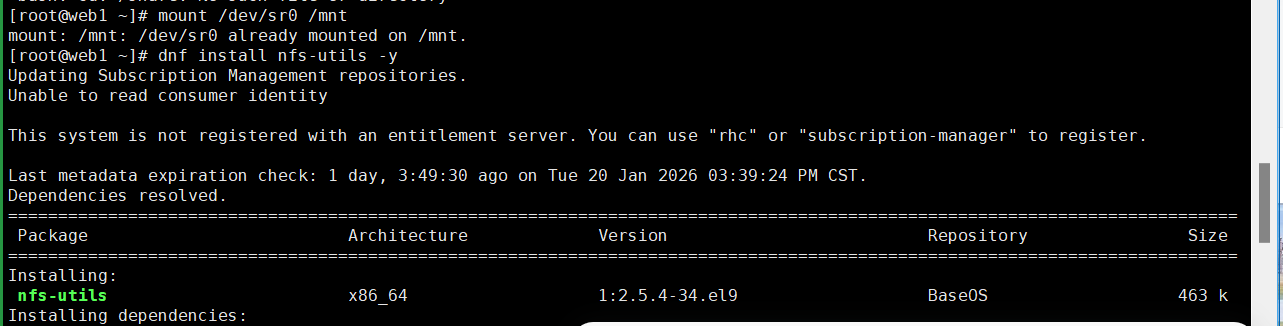
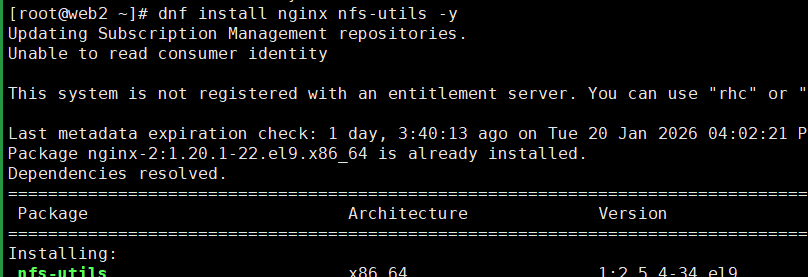
1、安装nginx和nfs-utils

2、挂载目录

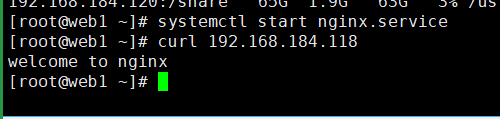
3、启动nginx
4、运行测试
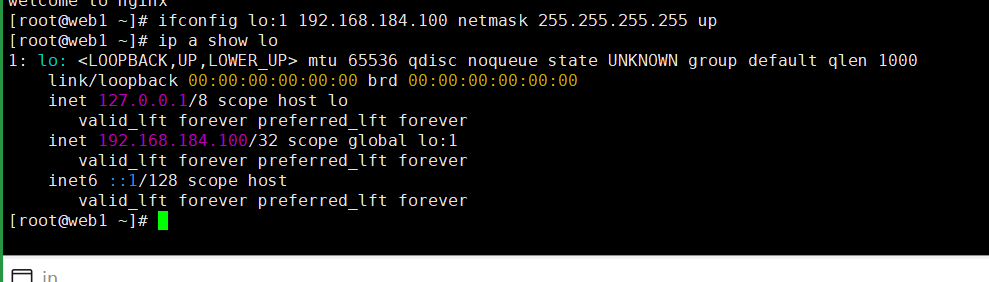
5、配置VIP
2.4 搭建web2
1、安装nginx和nfs-utils
2、挂载目录
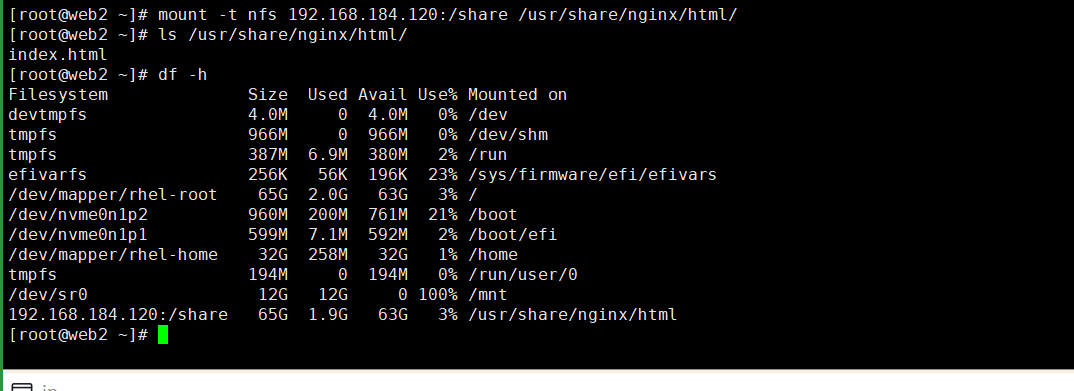
3、启动nginx
4、运行测试

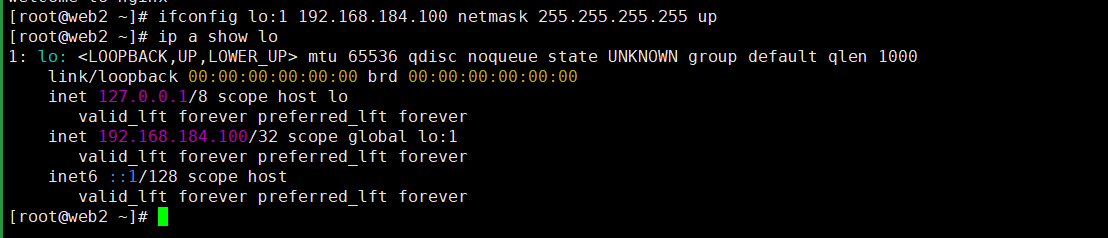
5、配置vip
2.5 搭建lvs-master
1、安装ipvsadm和keepaived

2、创建lvs的配置文件

3、启动lvs

4、配置keepalived
[root@lvs-master ~]# cp /etc/keepalived/keepalived.conf{,.bak}
[root@lvs-master ~]# vim /etc/keepalived/keepalived.conf
文件的内容如下:
global_defs {
router_id LVS_master
}
vrrp_script chk_nginx {
script "/etc/keepalived/check_nginx.sh"
interval 2
fall 3
rise 2
}
vrrp_instance VI_1 {
state MASTER
interface ens160
virtual_router_id 51
priority 100
advert_int 1
authentication {
auth_type PASS
auth_pass 1111
}
virtual_ipaddress {
192.168.184.100
}
#track_script {
# chk_nginx
#}
}
virtual_server 192.168.184.100 80 {
delay_loop 6
lb_algo rr
lb_kind DR
protocol TCP
real_server 192.168.184.118 80 {
weight 1
TCP_CHECK {
connect_port 80
connect_timeout 3
retry 3
delay_before_retry 3
}
}
real_server 192.168.184.119 80 {
weight 1
TCP_CHECK {
connect_port 80
connect_timeout 3
retry 3
delay_before_retry 3
}
}
}
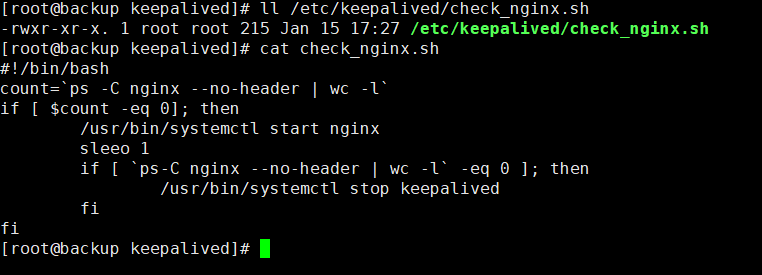
5、编写检查脚本
[root@lvs-master ~]# vim /etc/keepalived/check_nginx.sh
脚本内容如下:
#!/bin/bash
count=`ps -C nginx --no-header | wc -l`
if [ $count -eq 0 ]; then
/usr/bin/systemctl start nginx
sleep 1
if [ `ps -C nginx --no-header | wc -l` -eq 0 ]; then
/usr/bin/systemctl stop keepalived
fi
fi
然后给这个脚本可执行权限

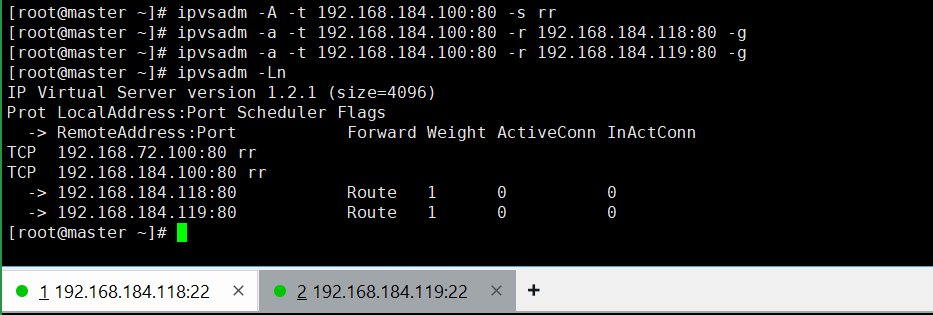
6、查看LVS规则
7、启动keepalived
systemctl start keepalived.service
8、查看VIP
2.6 搭建lvs-backup
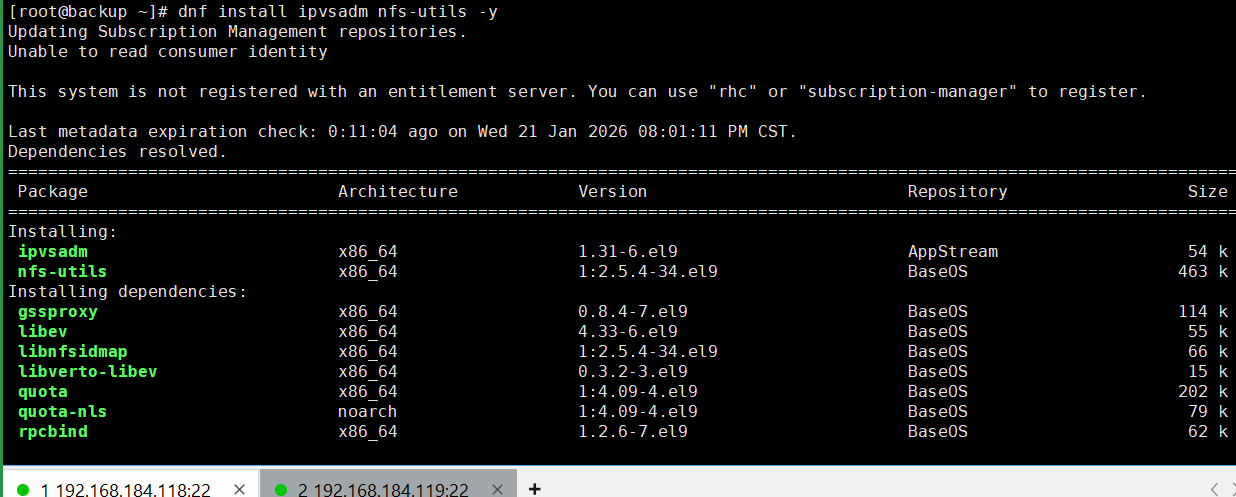
1、安装ipvsadm和keepalived
2、创建lvs配置文件
3、启动lvs

4、配置keepalived
# 1. 从lvs-master服务器上复制配置文件
global_defs {
router_id LVS_backup
}
vrrp_script chk_nginx {
script "/etc/keepalived/check_nginx.sh"
interval 2
timeout 2
weight -20
fall 3
rise 2
}
vrrp_instance VI_1 {
state BACKUP
interface ens160
virtual_router_id 51
priority 90
advert_int 1
authentication {
auth_type PASS
auth_pass 1111
}
virtual_ipaddress {
192.168.184.100
}
#track_script {
# chk_nginx
#}
}
virtual_server 192.168.184.100 80 {
delay_loop 6
lb_algo rr
lb_kind DR
protocol TCPreal_server 192.168.184.118 80 {
weight 1
TCP_CHECK {
connect_port 80
connect_timeout 3
retry 3
delay_before_retry 3
}
}
real_server 192.168.184.119 80 {
weight 1
TCP_CHECK {
connect_port 80
connect_timeout 3
retry 3
delay_before_retry 3
}
}
}
5、确保脚本文件的可执行权限
6、启动keepalived

7、查看lvs规则
IP Virtual Server version 1.2.1 (size=4096)
Prot LocalAddress:Port Scheduler Flags
-> RemoteAddress:Port Forward Weight ActiveConn InActConn
此时,备用服务器中是没有负载均衡规则的。
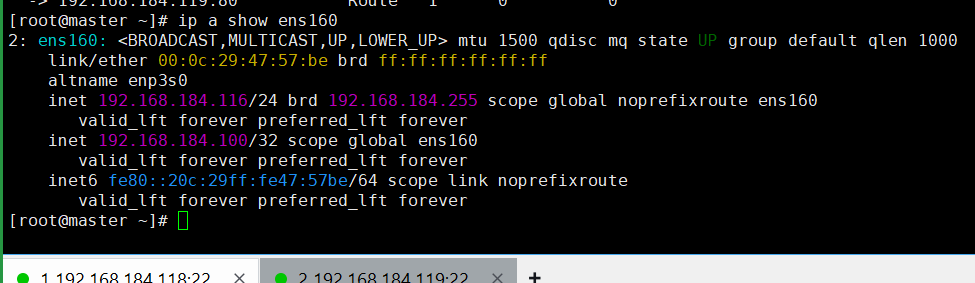
8、查看VIP

此处也没有VIP,因为VIP在 master 主机上。
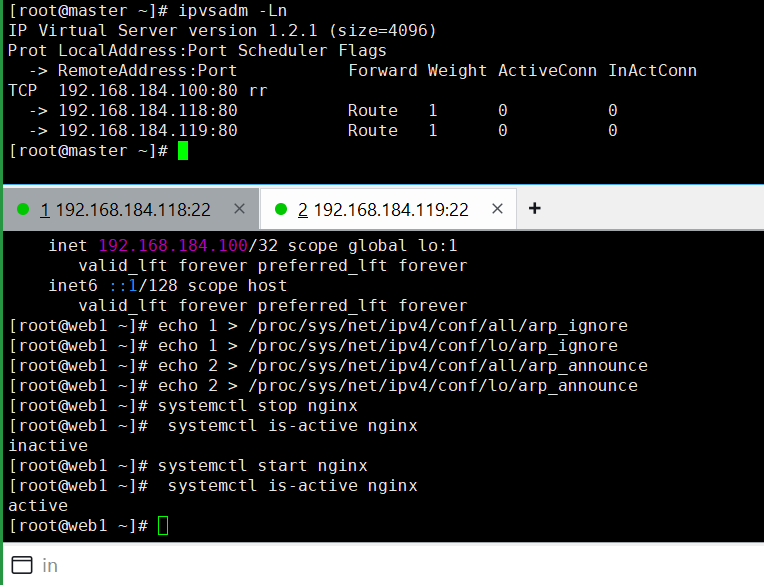
2.7 配置内核参数
由于我们采用的 DR 模式,因此我们需要为两台 RS 服务器配置内核参数。


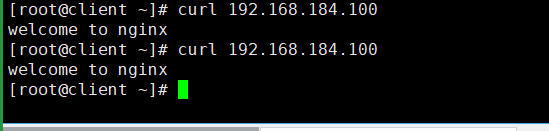
2.8 运行测试
1、在lvs-master和lvs-backup都正常的情况下
3、关闭rs1上的nginx服务

# 2. 然后再查看lvs-master上的LVS规则

# 3. 再次把rs1上的nginx服务启动
# 4. 然后再查看lvs-master上的LVS规则

助力广东及东莞地区开发者,代码托管、在线学习与竞赛、技术交流与分享、资源共享、职业发展,成为松山湖开发者首选的工作与学习平台
 13
13 0
0- 0


 已为社区贡献1条内容

所有评论(0)